Open Recent Lists the most recent scenes you have used.
Bake Toggles whether the scene you launch will be baked. When baking is enabled, KeyVR will cache the baking data.
Remove Baking cache: Enables you to clear the baking data.
Preferences… Launches the Preferences dialog
Activate license… This option enables you to activate a different license
XR mode: Toggels the XR mode. When XR mode is enabled, the environment is replaced with a feed from the HMD’s external camera - allowing you experience your model in your current surroundings. This option is available if you HMD has an external camera.
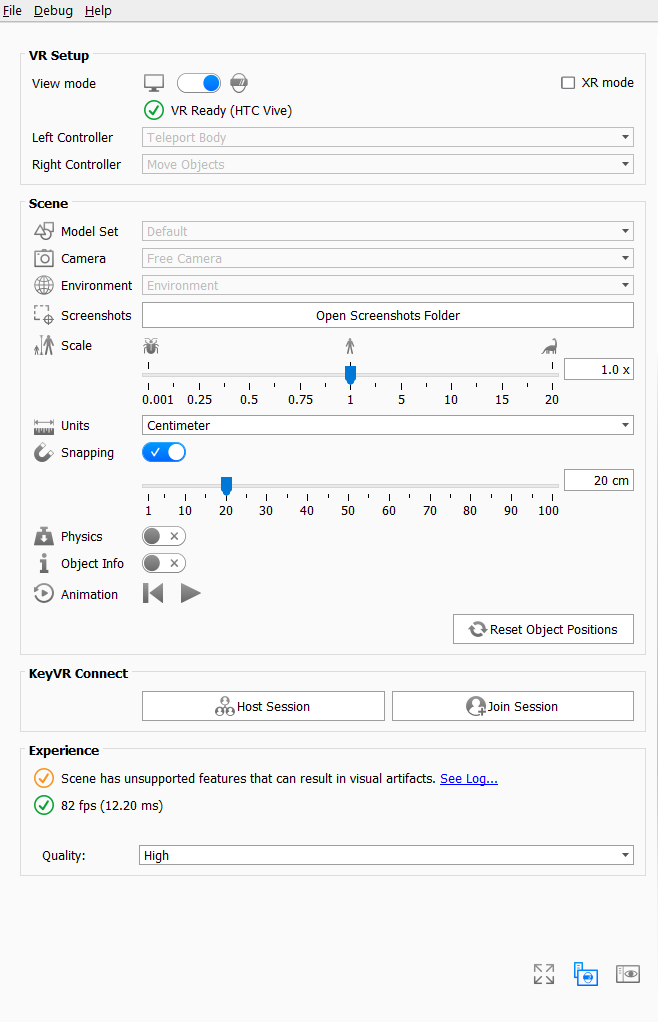
Snapping: Toggle snapping. Used in the precise move tool, measurements and in-hand object rotating.
Snapping scale: When snapping is enabled, you can adjust the scale of the grid it snaps toScale: Enables you set your size in the VR space. The Slider takes its offset in an average height of a human and lets you scale between 1/1000x and 20x this height.
Units: Set the units used for the Measure tool and Snapping.
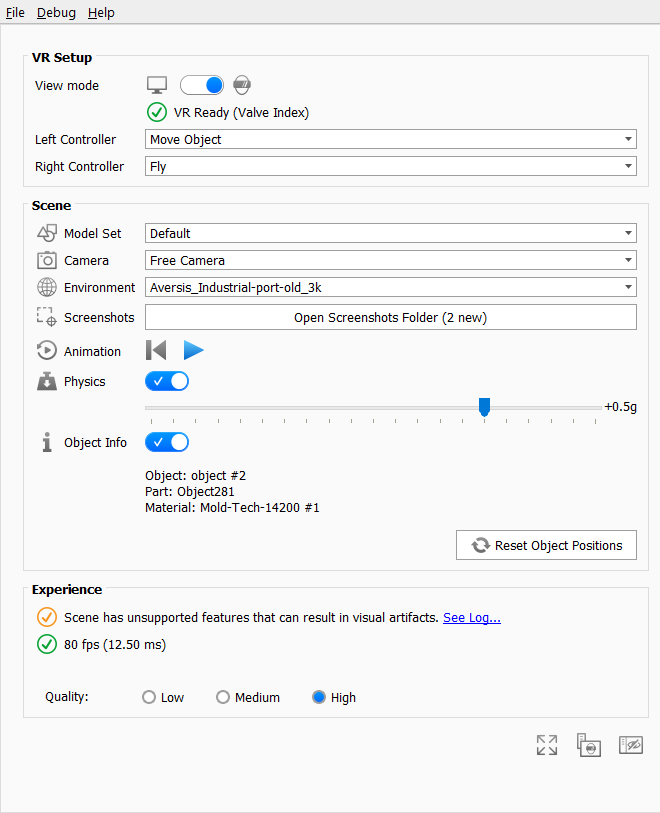
Animation: If the BIP file contains animation the animation can be started/paused and reset to start.
Here you can start or join a Connect session. Learn more about KeyVR Connect.
Experience
Here you can see the frame rate of the current KeyVR experience. For the best experience the frame rate should always be equal to (or above) the refresh rate of the HMD (typically 90hz). If the frame rate is below that, consider setting the graphics quality lower, or reducing number of polygons.
- Quality: The quality is by default set to high. Depending on scene complexity and GPU hardware you may experience low frame rates, in this case you can decrease quality to Medium or Low in order to keep a sufficient frame rate.
| Panel | ||
|---|---|---|
| ||
|