 Move Objects
When you aim at an object and the beam color changes from grey to green it means that the object can be moved. Aim at an object, press and hold the trigger to grab it and release it to drop the object again.
While you are holding an object, you can rotate it along the local XYZ axis by pressing on the top/bottom/left/right areas on the controller's track-pad or by moving the joystick. If physics is activated If Snapping is enabled, the object will rotate in 45° increments. This is useful to inspect the backside of an object you are currently holding in your hand for example.
If Physics is activated, objects have inertia , and can be thrown aroundand will drop to the ground or rest on objects below when released. Note that you can not rotate objects as described above when Physics is enabled.
If the controller is aimed at the environment, the environment can be rotated (unless it has been locked when the scene was set up). Learn more about Changing the environment
 Precise Move Objects
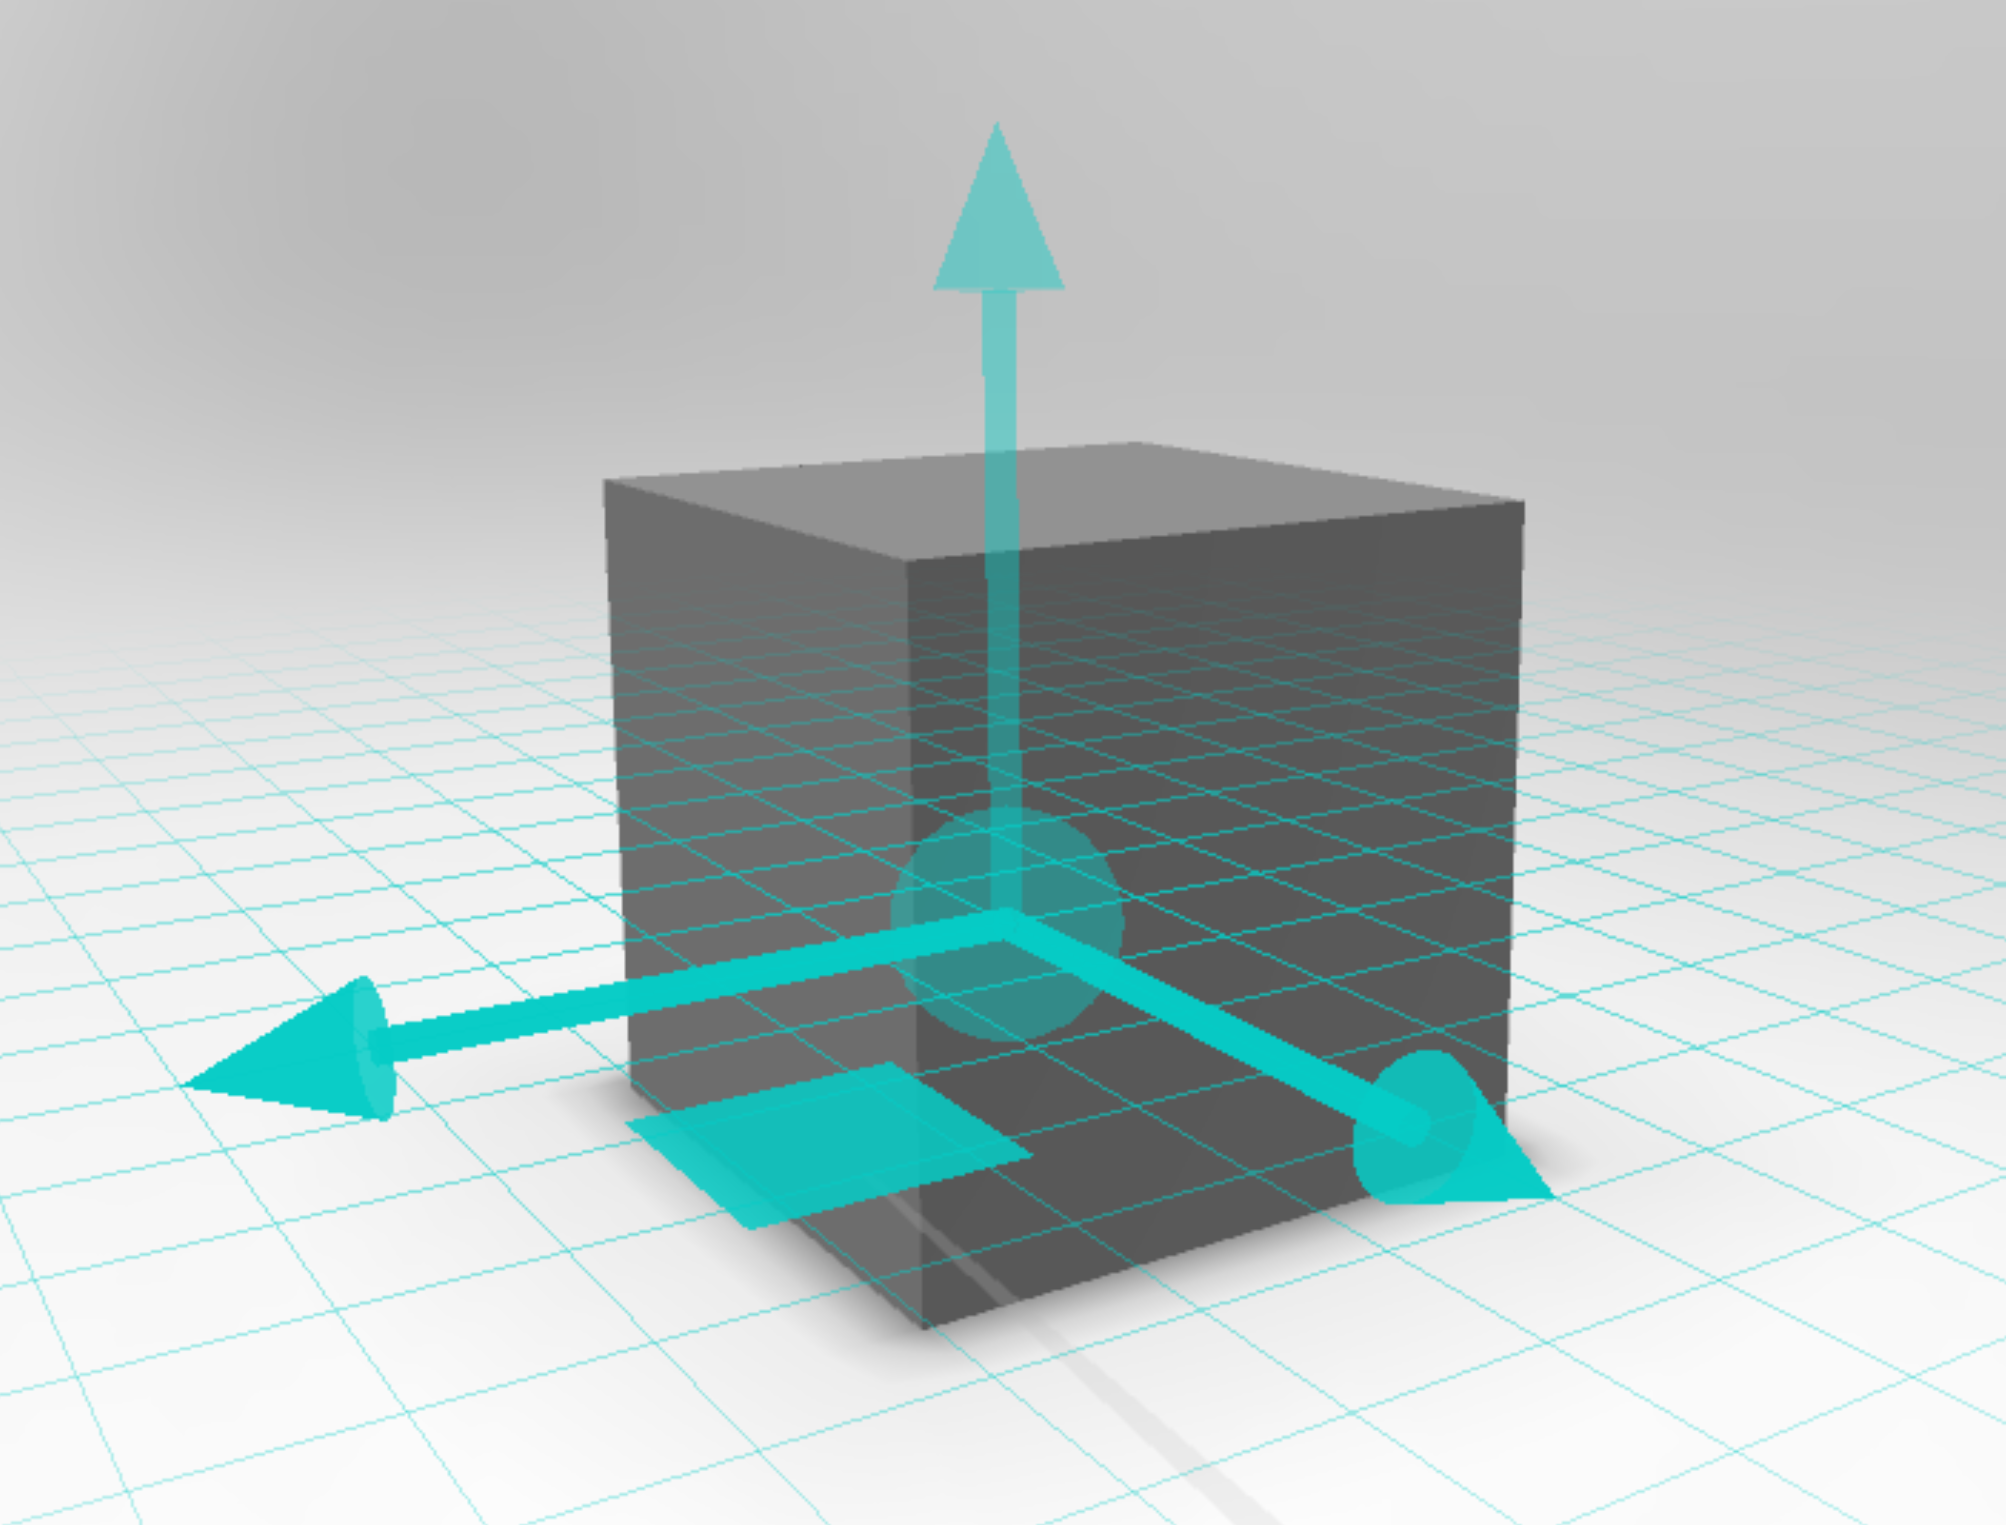
When you aim at an object and trigger the Precise Move Tool a grid and move gizmo will appear. Now you can move the object by dragging on of the handles in the gizmo. You can By default the X-Z plane will be highlighted with a grid and have a little square handle that will enable you to move freely on that plane. You switch between planes (XY, XZ and YZX-Z, X-Y and Y-Z) by pointing the controller to the central sphere in the gizmo and clicking the trigger button.
If Snapping is active, the object will move in increments that matches the grid. The grid units and scale can be adjusted via the Desktop UI (when Snapping is activated).
| Info |
|---|
Locked objects |
Changing appearance of objects
 Switch Materials
Enables you to change the appearance of objects that are set up with multi-materials in KeyShot.
When you aim at a part, and the color of the beam changes from grey to green, it means that the part has several material options (Multi-Material)you can change its appearance. Pressing the trigger button will cycle through the available materials. You can also press and hold the trigger to bring up all materials in the current Multi-Material in a grid layout (Fig 2). Move the controller to select between the options and release the trigger when the desired material is highlighted.
 Switch Model Set
If the scene includes multiple Model Sets, this option enables you to switch between them.
Each flick on Use the trigger selects button to cycle through the next Model Set. Press Sets of your scene. Or press and hold the trigger to see /and select between all available Model Sets. This will bring out a grid view of all options, where you can select the one(s) you want to see.
The active Model Set can also be set via the Desktop UI.
 Measure
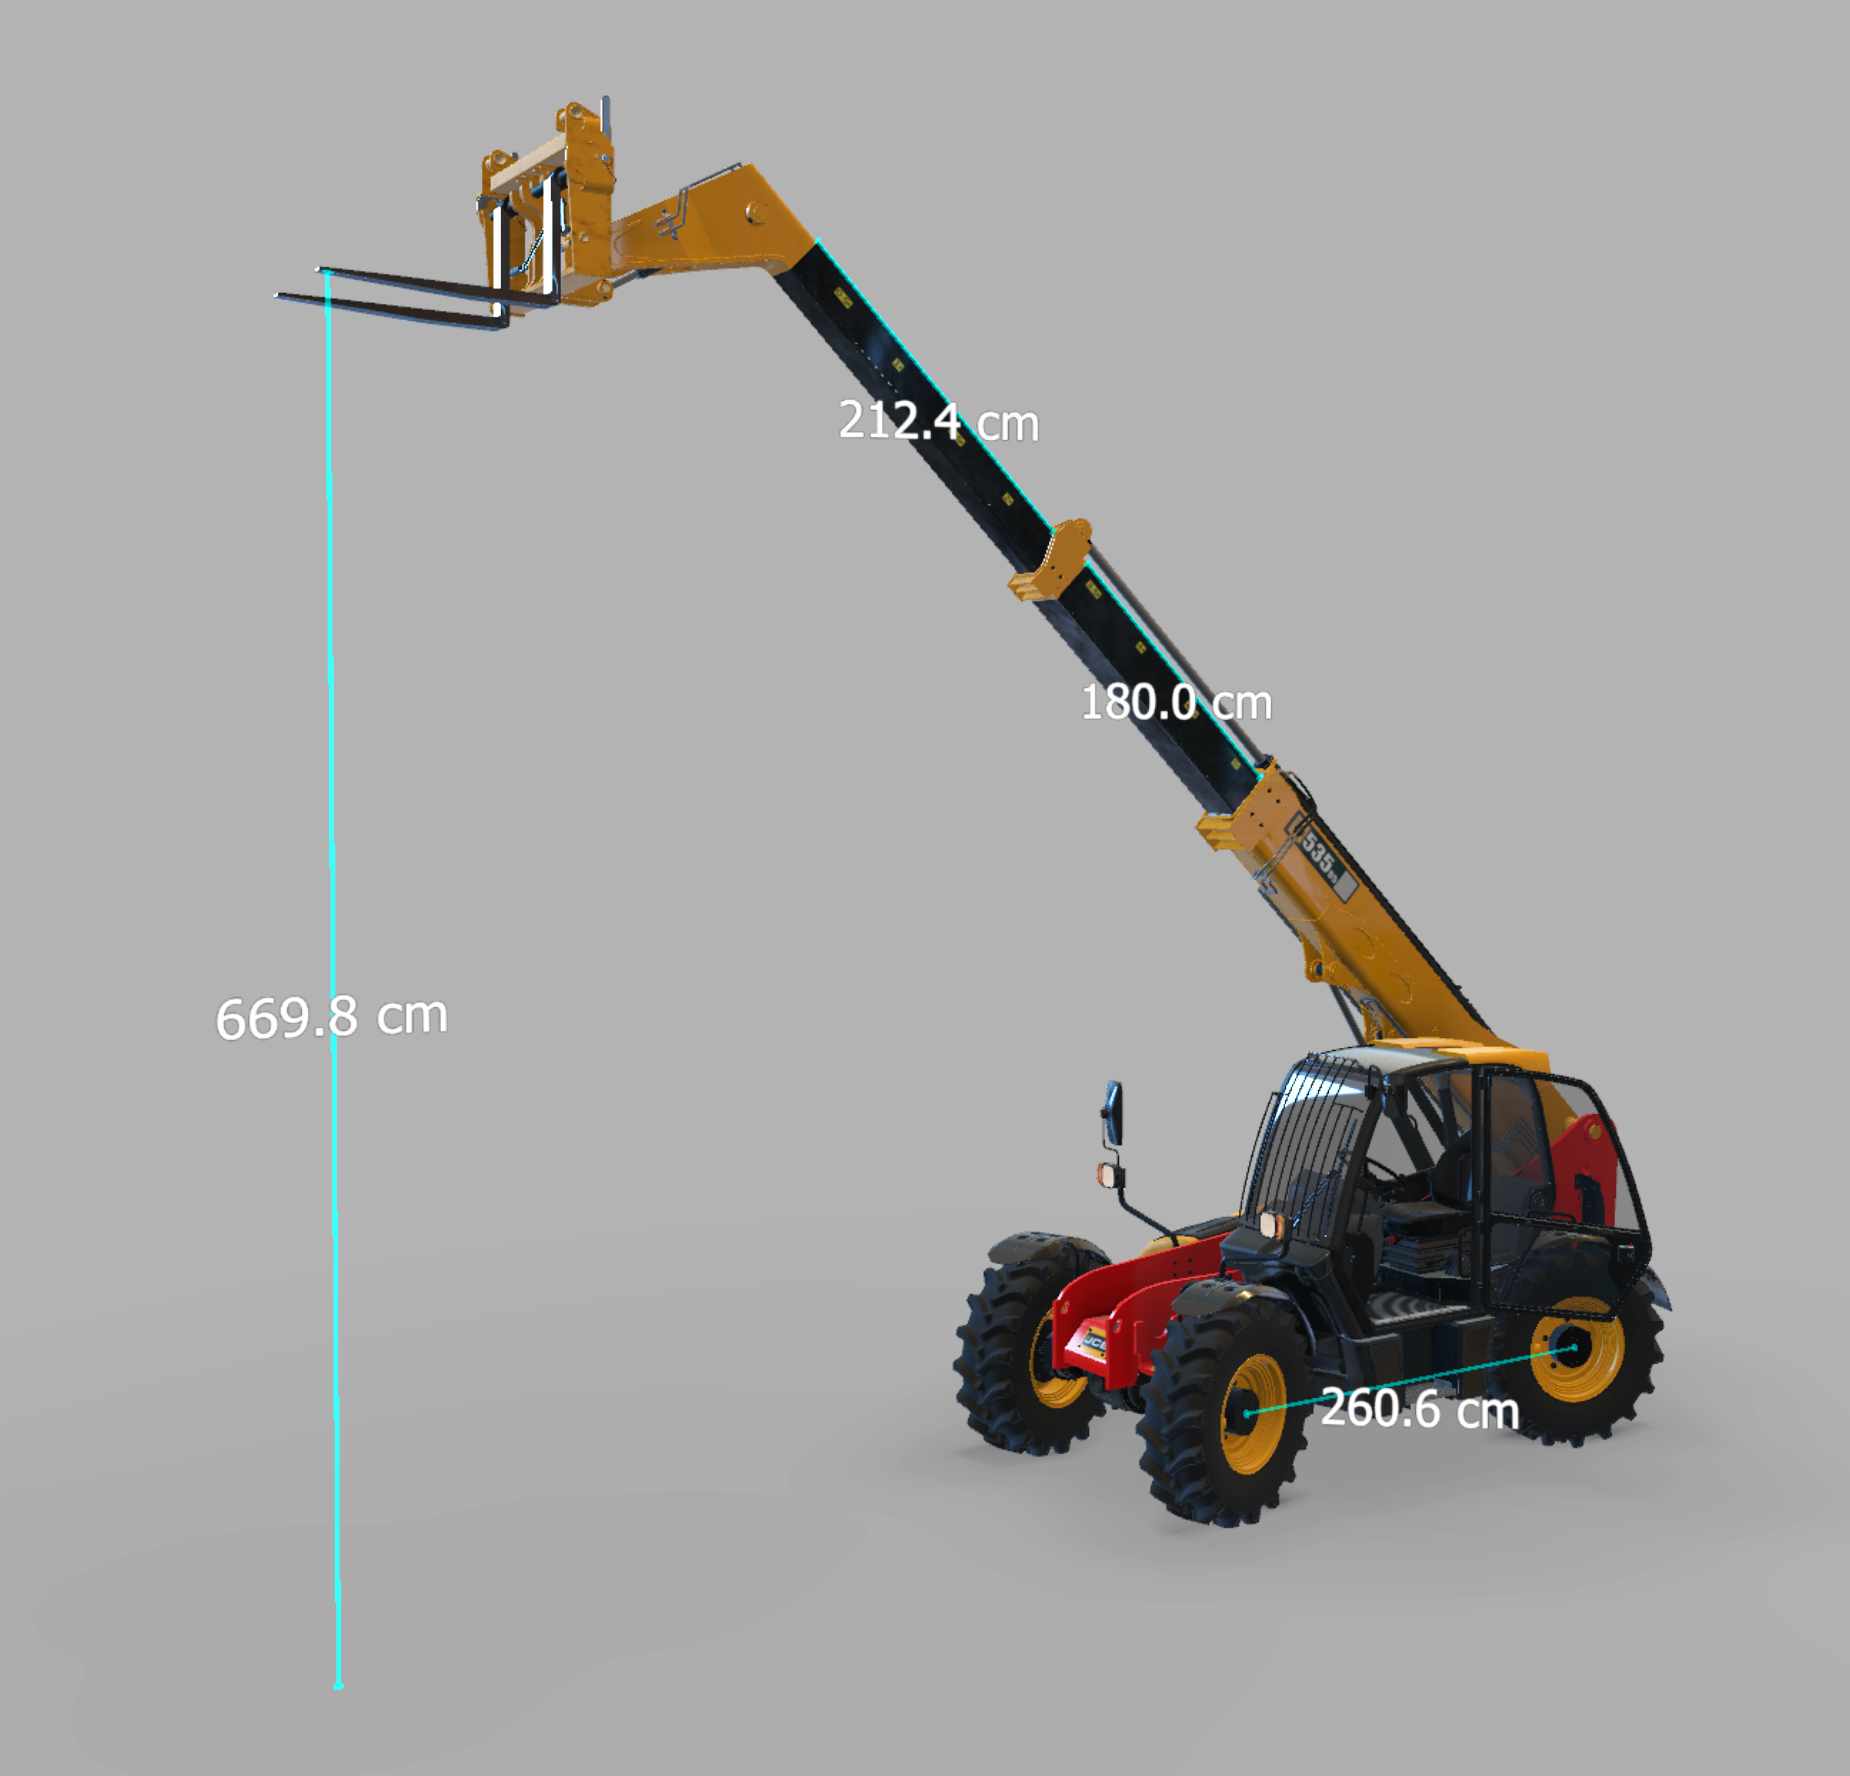
objectsThis enables you to measure anything in the scene. Point at one end of what you want to measure , and press and hold the trigger, . Now point to the end of the object and release press the trigger again to finalize the measurement. Now a line will show the extend of what your measurement the line is consolidated and a label will tell you the valuethe length.
You can also switch to another tool after the first point is selected, enabling you to eg. fly or teleport and then switch back to the measure mode, to finalize the measurement.
The measurement is made in the unit Units selected in the Desktop UI.
If snapping Snapping is enabled this also applies to the measure tool. When it is active, there will be guides in the XYZ axis, that you can snap to, and that way secure that the measurement is made in the desired direction.
Snapping can be toggled on/off in both the VR menu and in the Desktop UI.
Deleting a measurement
Make sure your controller is in Measure mode, point at the measurement you want to remove so the measure line is highlighted. Now press and hold the trigger until the measurement turns red and release. You can delete all measurements by simply holding the trigger while not pointing the controller at one specific measurement. Note that deleting measurements can not be undone.
Take Screenshot
With this tool you can grab screenshots of what you see in VR, simply point the controller at what you want an image of, fit it into the frame and press the trigger to capture the image. You can zoom in/out by moving the joystick up/down (Oculus) or by holding your thumb on the top/bottom half of the track pad (Windows Mixed reality and HTC)trackpad. All screenshots will be stored in the default image Pictures folder on your PC. You can open this folder directly from the Desktop UI.

