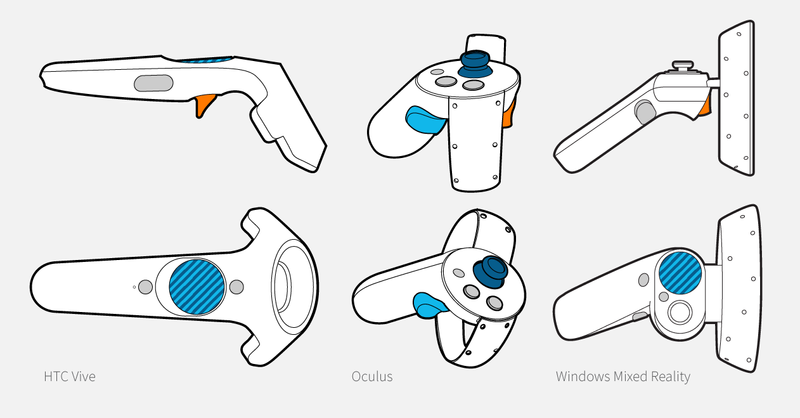
![]() Menu button
Menu button ![]() Menu and navigation in the scene
Menu and navigation in the scene![]() Navigation in the scene
Navigation in the scene![]() Trigger button
Trigger button
| Table of Contents |
|---|
Menu
To launch the menu, press and hold the Menu button, move the controller to the desired mode/state and release the Menu button to select a mode or toggle a state.
Modes
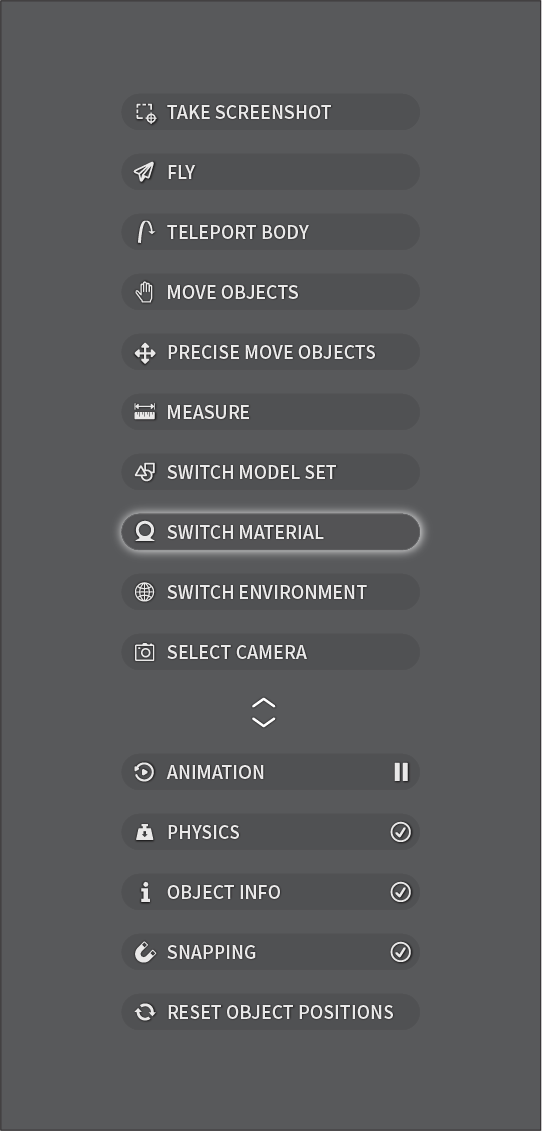
Set the mode for the controller by selecting one of the top six items in the menu. The choice only applies to the controller from where the menu was launched - this allows you to e.g. select materials with one hand while the other can move objects.
![]() Take Screenshot
Take Screenshot
- Enables you to grab screenshots of what you see in VR
![]() Fly
Fly
Aim the controller in the direction you want to move and press the trigger. Control the speed by adjusting the pressure on the trigger. You can also rotate the view with a sideways swipe on the track pad or by moving the joystick sideways.
![]() Teleport Body
Teleport Body
The controller can be used to aim at locations on the floor, and the trigger button transports the HMD to that location. You can also rotate the view with a sideways swiping motion on the track pad or joystick.
![]() Move Object
Move Object
When you aim at an object and the beam color changes from grey to green it means that the object can be moved. Aim at an object, press and hold the trigger to grab it and release it to drop the object again. If physics is activated objects have inertia, and can be thrown around. If the controller is aimed at the environment, then the environment can be rotated (unless it has been locked when the scene was set up).
A quick press in and out of the trigger while in Move Object mode will activate the Fine Move Object mode with a 3D widget for rotation and translation of the object. See Fig 2.
![]() Switch Model Set
Switch Model Set
Each press of the trigger button selects the next Model Set. Press and hold the trigger to see/select between all available Model Sets. This will bring out a grid view of all options, where you can select the one(s) you want to see.
Cycle through environments by pressing the trigger. You can also press and hold the trigger to show all available environments in a grid layout. Move the controller and release the trigger to select the highlighted environment.
![]() Switch Materials
Switch Materials
When you aim at a part, and the color of the beam changes from grey to green, it means that the part has several material options (Multi-Material). Pressing the trigger button will cycle through the available materials. You can also press and hold the trigger to bring up all materials in the current Multi-Material in a grid layout (Fig 3). Move the controller to select between the options and release the trigger when the desired material is highlighted.
The controller can be used to aim at cameras in the scene, and the trigger button transports the HMD to that location. The beam will always snap to the nearest camera position. To rotate the point of view, swipe sideways on the track pad or move the joystick in the direction you want to rotate.
States
Selecting on of the lower three entries will change the overall state of KeyVR;
. Learn more on the Handling objects in the scene page.
![]() Fly - Enables you to “fly” in any direction. Learn more on the Moving in the scene page.
Fly - Enables you to “fly” in any direction. Learn more on the Moving in the scene page.
![]() Teleport Body - Enables you to point to a position and jump to it, with a single flick of the trigger. Learn more on the Moving in the scene page.
Teleport Body - Enables you to point to a position and jump to it, with a single flick of the trigger. Learn more on the Moving in the scene page.
![]() Move Objects - Enables you to grab and move an object.
Move Objects - Enables you to grab and move an object.
![]() Precise Move Objects - This will bring out a move gizmo that facilitates more precise moving of the objects. Learn more on the Handling objects in the scene page.
Precise Move Objects - This will bring out a move gizmo that facilitates more precise moving of the objects. Learn more on the Handling objects in the scene page.
![]() Measure - Enables you to measure items in the scene. Learn more on the Handling objects in the scene page.
Measure - Enables you to measure items in the scene. Learn more on the Handling objects in the scene page.
![]() Switch Model Set - If the scene includes multiple Model Sets, this option enables you to switch between them. Learn more on the Handling objects in the scene page.
Switch Model Set - If the scene includes multiple Model Sets, this option enables you to switch between them. Learn more on the Handling objects in the scene page.
![]() Switch environment - If the scene has multiple environments, this option enables you to switch between them. Learn more about Changing the environment.
Switch environment - If the scene has multiple environments, this option enables you to switch between them. Learn more about Changing the environment.
![]() Switch Materials -Enables you to change the appearance of objects that are set up with multi-materials.Learn more on the Handling objects in the scene page.
Switch Materials -Enables you to change the appearance of objects that are set up with multi-materials.Learn more on the Handling objects in the scene page.
![]() Select Camera - Enables you to jump to the position of any camera included in the scene. Learn more on the Moving in the scene page.
Select Camera - Enables you to jump to the position of any camera included in the scene. Learn more on the Moving in the scene page.
States
![]() Animation -Starts/stops the animation sequence from the BIP file
Animation -Starts/stops the animation sequence from the BIP file
![]() Physics
Physics
-Activates/deactivates physics. When physics is activated and the user moves objects around, they will behave as rigid objects under gravity.
![]() Object Info
Object Info
- When Object Info is enabled, the properties of the item you are pointing to, will be displayed next to the controller (and in the desktop UI).
![]() Snapping -Toggle snapping, snapping is used in connection with the precise move tool and the measure tool. Learn more on the Handling objects in the scene page.
Snapping -Toggle snapping, snapping is used in connection with the precise move tool and the measure tool. Learn more on the Handling objects in the scene page.
![]() Reset Object Positions
Reset Object Positions
Resets the position of all objects/animations to the default value
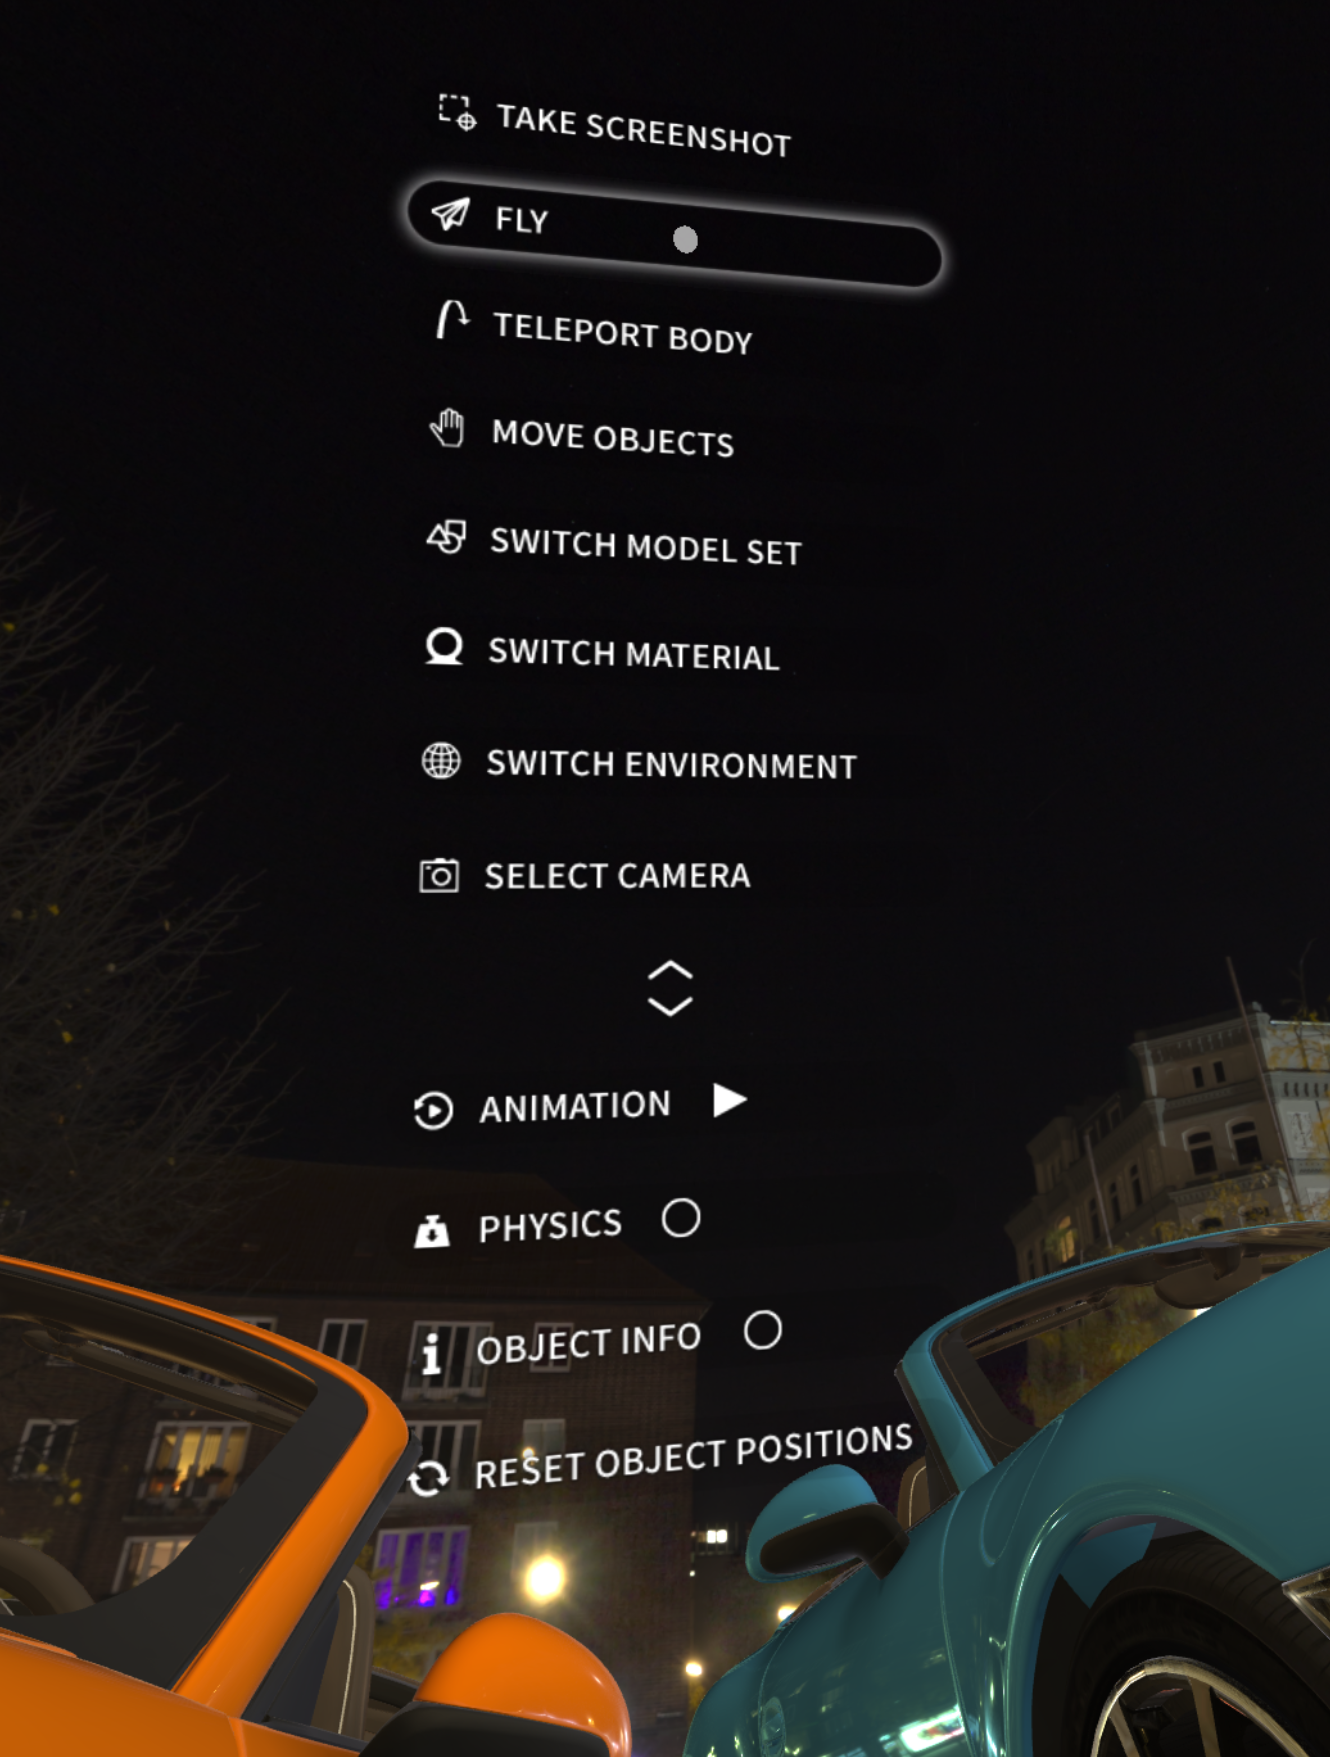
Fig 1. When the menu is triggered, the options will appear in front of you.
Move the controller up/down and release to select.
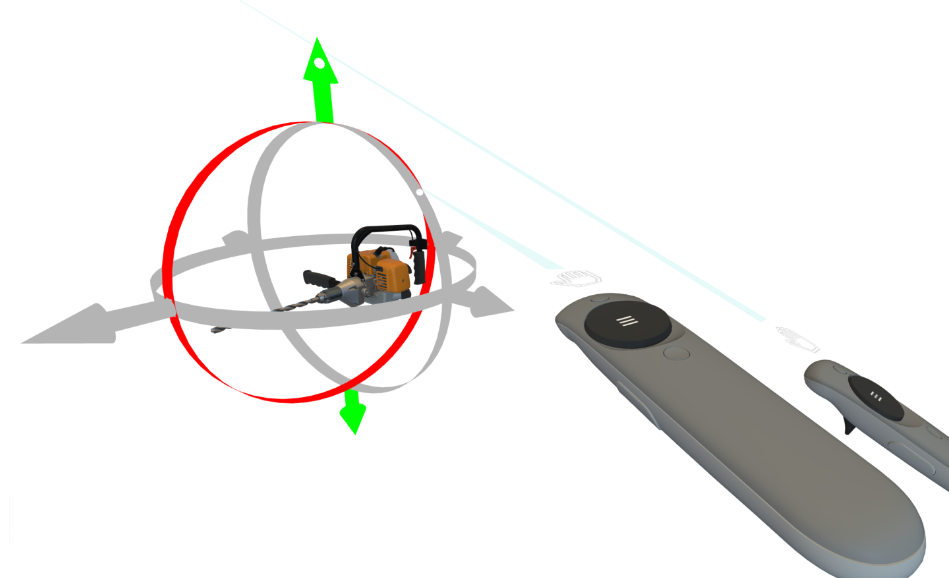
Fig 2. The Fine Move Object widget that appears in Move Mode if you quickly flick the trigger button.
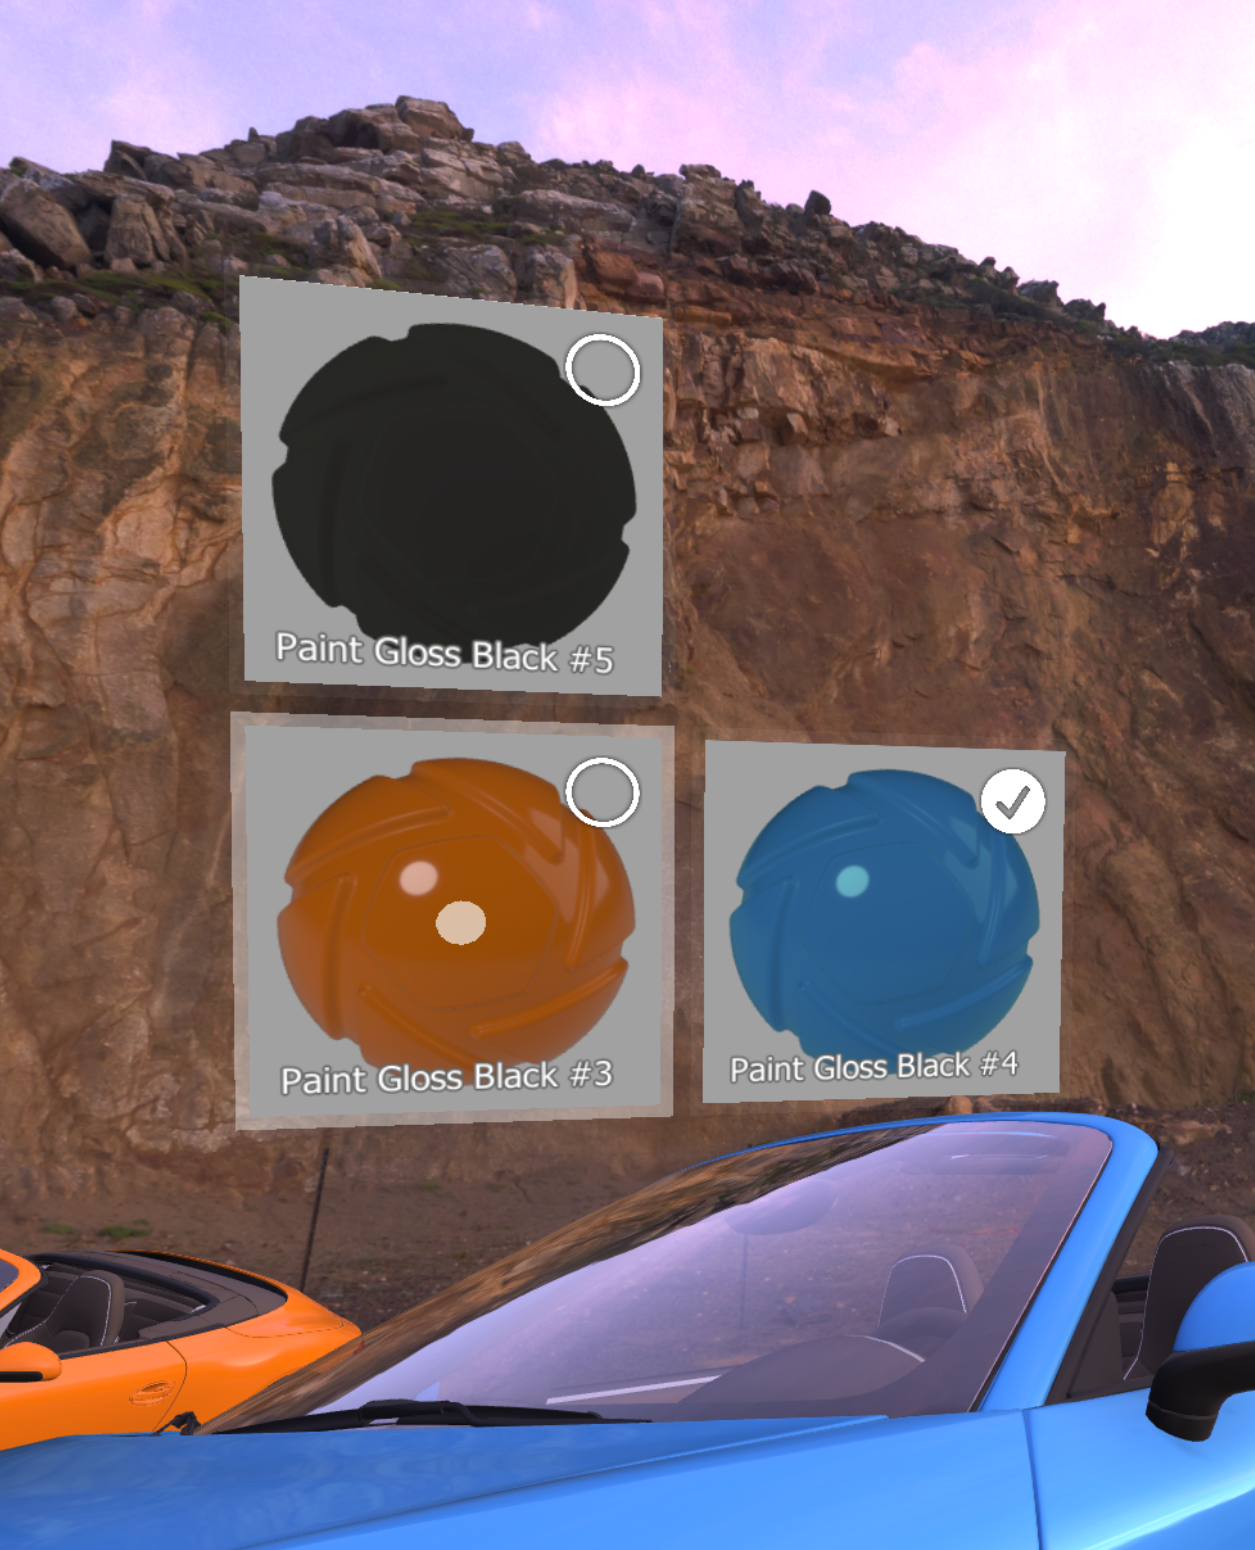 Fig 3. Press and hold the trigger will bring out a grid view of the available options
.