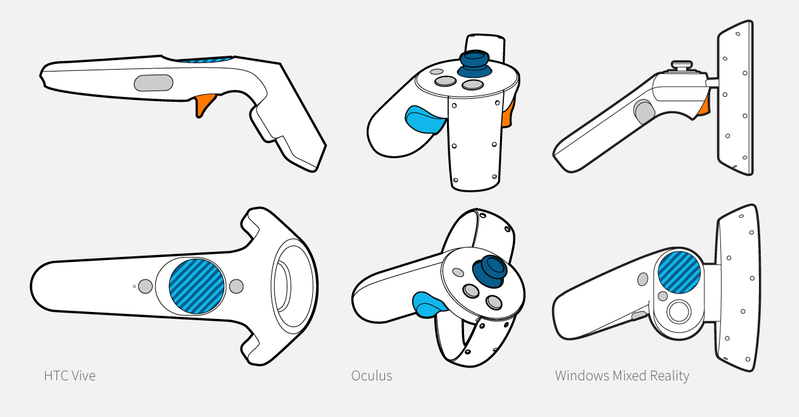
Menu button
Menu and navigation in the scene
Navigation in the scene
Trigger button
Menu
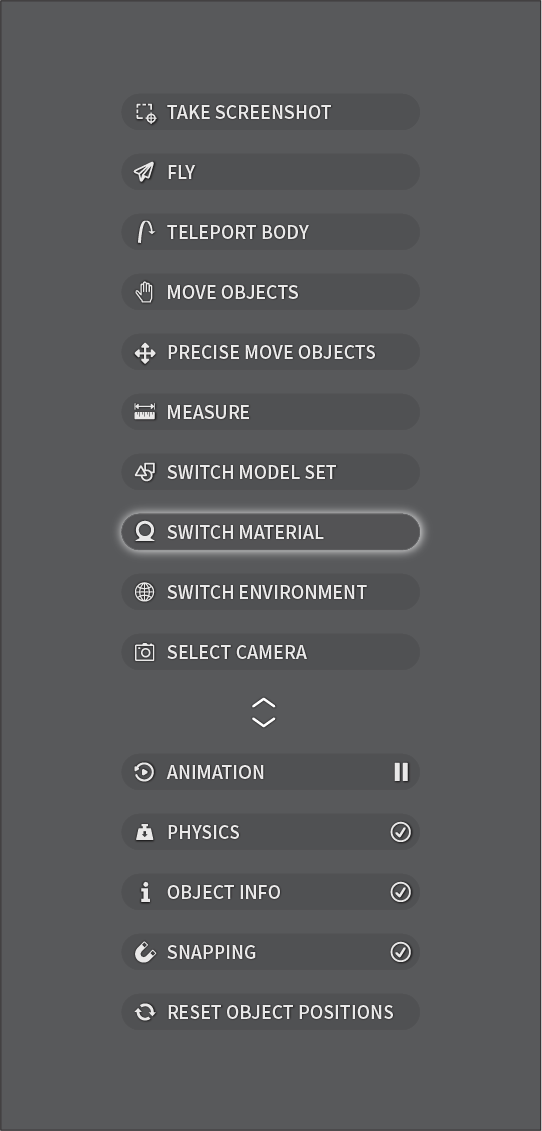
To launch the menu, press and hold the Menu button, move the controller to the desired mode/state and release the Menu button to select a mode or toggle a state.
Modes
Set the mode for the controller by selecting one of the top six items in the menu. The choice only applies to the controller from where the menu was launched - this allows you to e.g. select materials with one hand while the other can move objects.
![]() Take Screenshot - Enables you to grab screenshots of what you see in VR. Learn more on the Handling objects in the scene page.
Take Screenshot - Enables you to grab screenshots of what you see in VR. Learn more on the Handling objects in the scene page.
![]() Fly - Enables you to “fly” in any direction. Learn more on the Moving in the scene page.
Fly - Enables you to “fly” in any direction. Learn more on the Moving in the scene page.
![]() Teleport Body - Enables you to point to a position and jump to it, with a single flick of the trigger. Learn more on the Moving in the scene page.
Teleport Body - Enables you to point to a position and jump to it, with a single flick of the trigger. Learn more on the Moving in the scene page.
![]() Move Objects - Enables you to grab and move an object.
Move Objects - Enables you to grab and move an object.
![]() Precise Move Objects - This will bring out a move gizmo that facilitates more precise moving of the objects. Learn more on the Handling objects in the scene page.
Precise Move Objects - This will bring out a move gizmo that facilitates more precise moving of the objects. Learn more on the Handling objects in the scene page.
![]() Measure - Enables you to measure items in the scene. Learn more on the Handling objects in the scene page.
Measure - Enables you to measure items in the scene. Learn more on the Handling objects in the scene page.
![]() Switch Model Set - If the scene includes multiple Model Sets, this option enables you to switch between them. Learn more on the Handling objects in the scene page.
Switch Model Set - If the scene includes multiple Model Sets, this option enables you to switch between them. Learn more on the Handling objects in the scene page.
![]() Switch environment - If the scene has multiple environments, this option enables you to switch between them. Learn more about Changing the environment.
Switch environment - If the scene has multiple environments, this option enables you to switch between them. Learn more about Changing the environment.
![]() Switch Materials - Enables you to change the appearance of objects that are set up with multi-materials. Learn more on the Handling objects in the scene page.
Switch Materials - Enables you to change the appearance of objects that are set up with multi-materials. Learn more on the Handling objects in the scene page.
![]() Select Camera - Enables you to jump to the position of any camera included in the scene. Learn more on the Moving in the scene page.
Select Camera - Enables you to jump to the position of any camera included in the scene. Learn more on the Moving in the scene page.
States
![]() Animation - Starts/stops the animation sequence from the BIP file
Animation - Starts/stops the animation sequence from the BIP file
![]() Physics - Activates/deactivates physics. When physics is activated and the user moves objects around, they will behave as rigid objects under gravity.
Physics - Activates/deactivates physics. When physics is activated and the user moves objects around, they will behave as rigid objects under gravity.
![]() Object Info - When Object Info is enabled, the properties of the item you are pointing to, will be displayed next to the controller (and in the desktop UI).
Object Info - When Object Info is enabled, the properties of the item you are pointing to, will be displayed next to the controller (and in the desktop UI).
![]() Snapping - Toggle snapping, snapping is used in connection with the precise move tool and the measure tool. Learn more on the Handling objects in the scene page.
Snapping - Toggle snapping, snapping is used in connection with the precise move tool and the measure tool. Learn more on the Handling objects in the scene page.
![]() Reset Object Positions
Reset Object Positions
Resets the position of all objects/animations to the default value.

